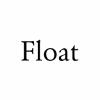
 Figure 1: Our text image. This will be our mask.
One of the nice things about graphics programs like Adobe Photoshop and The GIMP, is that you can do many cool things with image, text, and textures. If you don't already have the added plug-ins that have been contributed to the GIMP, you should get them. They are available (in some cases, precompiled) at The GIMP Plug-In List.
This is a tutorial (well, a tip really) on how to get color-text, or textured-text floating on black (i.e. normal) shadows. Thanks go to Mike Phillips for pointing out what a stupid amount of trouble I had gone through before, and to Federico Mena for pointing out the the features of composite that should have been obvious, but weren't.
However, this won't work well with pictures, or color images you start out with. So, my old way can be found on the this page.
This is a tutorial on how to get color-text, or textured-text, on a shadow. The concept is fairly simple. I highly recommend looking at the Using Channel Ops with GIMP page that Zachary Beane has.
First make a new greyscale image (Ctrl-N). Add whatever text you want to it, making sure the color is black. This is going to be your mask image, and the basis for your color image.
Figure 1: Our text image. This will be our mask.
Offset (Alt+O) it to around 2x and 3y (change this as suits the size of your image -- higher numbers means greater shadow effect). And Gaussian Blur (Shift+Alt+B) it, I use a level of 5. This is going to be our shadow image.
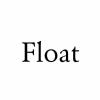 Figure 2: Our offset image.
 Figure 2.1: Our blurred offset image. This will be our drop shadow.
Now, you have to choose the pattern or color you want your image to be. You need to have it in a window the same size as your first image (that is Figure 1). If you are doing a simple color, you can Duplicate (Alt+D) the image and then clear it (Ctrl-K). Then use the Bucket Fill to color the entire image. If you have a pattern you want to use, you might try Tiling (Alt+T) it to the proper size. You can find the size of a window my choosing the View->Window Info choice from the pop-up menu. I'm going to choose a simple blue color to demonstrate this technique.
 Figure 3: Our choice in color -- real complex, huh? :)
Finally, Composite (Alt+C) our images. The first image is the color or texture image (Figure 3). The second image is the blurred shadow image (Figure 2.1). The Mask Image is our first image (Figure 1). Composite works the following way: Whatever is black in the Mask Image is replaced with the data from Image 1. Whatever is light in the Mask Image is replaced with the contents of Image 2. So we get a blue font over the shadow, without any color bleeding like we would if used other Channel Ops.
