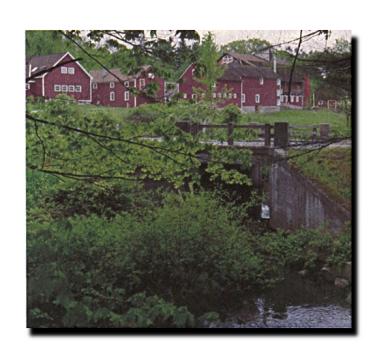
 Figure 1: Our picture with a white border.
One of the nice things about graphics programs like Adobe Photoshop and The GIMP, is that you can do many cool things with images, text, and textures. If you don't already have the added plug-ins that have been contributed to the GIMP, you should get them. They are available (in some cases, precompiled) at The GIMP Plug-In List.
This is a tutorial on how to get a shadow effect under a picture. The concept is fairly simple. I highly recommend looking at the Using Channel Ops with GIMP page that Zachary Beane has.
If you have, instead of a photo, a logo or something that is uniformly made of dark colors, you might see if this tutorial will work. The tutorial on this page is only for images which have light-colored or white sections (like most any photograph will).
Ok, so you have a picture and you would like to get a shadow under it. First thing to do is take the picture and, if it does not have a white border, add one. You can do this my simple copying and pasting into a larger Window (Ctrl+C to copy, Ctrl+V to paste), or you can use the Filters->Channel Ops->Canvas-Size filter. Add a good amount of border space, you can always trim it later.
Figure 1: Our picture with a white border.
Now you are going Duplicate (Alt+D) the picture and make the area it is in black. There are a few techniques I've been able use to get this black mask. I'm not particularly happy with any of them, but they do mostly work.
 Figure 2: Our black mask of the picture.
Now, Offset (Alt+O) this mask. The higher or lower X and Y numbers you specify will make for more or less shadow. I usually use 3X and 4Y for smaller pictures, and 9X+12Y for larger ones. Take this offset image and Gaussian Blur (Shift+Alt+B) it at anywhere from 5 to 10, depending on how big it is. This is our shadow image.
 Figure 3: Our offset image.
 Figure 3.1: Our shadow (Figure 3 blurred).
Now we make a Composite (Alt+C). The First Image is our original picture (Figure 1), our Second Image is the shadow (Figure 3.1), and the Mask Image is our black mask (Figure 2). As Xach pointed out in the Using Channel Ops with GIMP page, the composite does the following: