Okie-doke, by now we should be getting pretty good at creating 3D shapes. The thing is, everything in this world is not made from either plastic or clay, so let's add some surface textures to our images now.

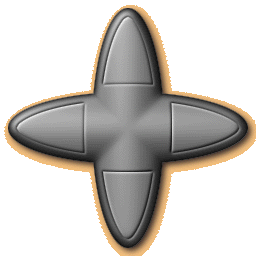
As per some of your requests, I'm going to include the masks I used for creating the 3D example pieces, here's one below with the greyscale shape next to it. The raw shape is created using the "Lighting Effects" filter, and the inset buttons using the "Inset Bar" technique.

(Follow this link to learn more on how I made this kriskros mask.)


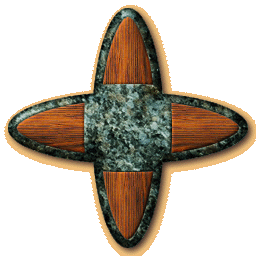
Here's what we can do when we overlay some of our background texture files over them. For this example I used a small wood tile I use for the WWW, and a larger picture I have of some granite. Quite the difference in impact, eh? On the left we have an obviously artificial image, and on the right we have this lump of stone, with wooden insets. Yah, you can almost feel the weight of it, now!


The first step is to get our texture into photoshop. Here's another good use for all those background images you've been saving for the web. Open a background file you'd like to use as a texture, select "all", and choose "edit/define pattern".

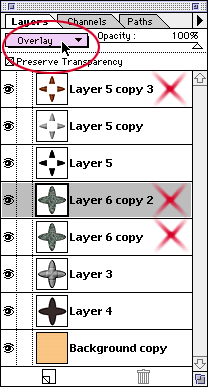
Now that texture is saved in Photoshop, and when you use the "edit/fill" command, choosing "pattern", "100%", and "normal", you can fill any size area you'd like, it will tile it normally. What you want to do is fill a selection exactly the same size as your object, in a layer above it. It should completely block the images underneath it. Now you adjust the mode of that layer.


When wrapping a texture over another layer, these 5 modes will be the ones you'll use most frequently.

  • Multiply: Does pretty much what you'd expect from the name, the layer will be multiplied by whatever is undernaeth them. This mode will frequently produce a very dark image. You may want to change the opacity to 50-75%, and perhaps combine it with an identical layer, only that one would use the "overlay" mode.

  • Screen: This mode will give you almost a glass-like look. Expect pastel tones with this mode, again, it's frequently best combined with another texture layer.

  • Overlay: This is the mode you'll use most frequently, it will wrap the texture with minimal tonal changes. Sometimes you may want to adjust the 3D shape image to have a higher contrast, so the shape is not overpowered by the texure.

  • Soft Light: The texture will be wrapped, but will sometimes appear somewhat muted. Best combined with the multiply mode at a lower percentage opacity.

  • Hard Light: This mode functions similarly to the overlay mode, except that the texture will appear with a much higher contrast. You'll use this mode at least as much as the overlay mode.


  • Entire contents copyright ©1994-98 by Doctor Thaddeus Ozone, all rights reserved.