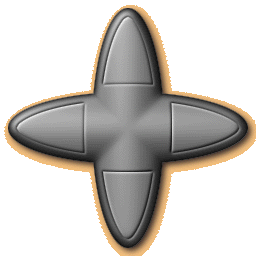
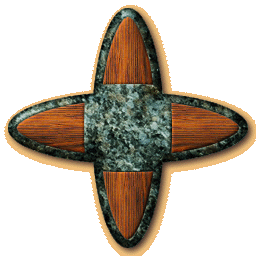
 Hee, hee, hee! I am such an evil bastard! Did everyone have fun trying to figure out that mask? It's easy, but you'll need to be working in the Layers pallette to do it. Hee, hee, hee! I am such an evil bastard! Did everyone have fun trying to figure out that mask? It's easy, but you'll need to be working in the Layers pallette to do it.
 Start with a single ellipse shape, white on black. Make sure it's centered, and your image is a perfect square. (You can crop it later, if necessary. You'll be working in the "Layers" pallette, but you'll also want a sharp version of this as a channel also. You'll be pasting the finished piece back into the channels later. Start with a single ellipse shape, white on black. Make sure it's centered, and your image is a perfect square. (You can crop it later, if necessary. You'll be working in the "Layers" pallette, but you'll also want a sharp version of this as a channel also. You'll be pasting the finished piece back into the channels later.
 OK, first, using the Gradient tool, set to 'darken', drag from first the top, and then the bottom, so you start to create a cylindrical shading. You still want to be able to still distinguish the shape easily, so don't get too dark. After you get that part right, select that shape, and do a couple gaussian blurs, first 8, 4, 2, then de-select and blur at 1. OK, first, using the Gradient tool, set to 'darken', drag from first the top, and then the bottom, so you start to create a cylindrical shading. You still want to be able to still distinguish the shape easily, so don't get too dark. After you get that part right, select that shape, and do a couple gaussian blurs, first 8, 4, 2, then de-select and blur at 1.
 OK, duplicate this layer, and rotate it 90 degrees. Set this layer to "lighten", and you've got the mask. Flatten it and copy it into a channel. It's that easy. OK, duplicate this layer, and rotate it 90 degrees. Set this layer to "lighten", and you've got the mask. Flatten it and copy it into a channel. It's that easy.
 You also need the selection of the shape, which we get from the original channel. Duplicate that channel, select all, and rotate it 90 degrees also. Select that shape, and hold down the shift key while loading the original shape, (this loads them both.) Now you've got the kriskros shape, which should match the mask. You also need the selection of the shape, which we get from the original channel. Duplicate that channel, select all, and rotate it 90 degrees also. Select that shape, and hold down the shift key while loading the original shape, (this loads them both.) Now you've got the kriskros shape, which should match the mask.
 Probably the most important point for this tutorial is to get folks used to working in the layers pallette, and combining several different masks to get the one, main mask. That whole mask was kind of a set up, I intentionally made a shape that needed a really complicated mask. (Plus it's all stuff I explained, but not as related to each other!) Probably the most important point for this tutorial is to get folks used to working in the layers pallette, and combining several different masks to get the one, main mask. That whole mask was kind of a set up, I intentionally made a shape that needed a really complicated mask. (Plus it's all stuff I explained, but not as related to each other!)
 I'll be adding some screen captures in a little while, but I thought I'd add this text to keep from getting lynched! I'll be adding some screen captures in a little while, but I thought I'd add this text to keep from getting lynched!
|
