
Or: How I made those nifty, floating logos
NOTE: Select the small image to retrieve the full-sized version. I shrank the in-line examples some to be nice to the net.
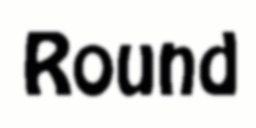
First, you start with some text:

(Figure 1: Untitled-1 (U1) )
Then offset it (for small to medium, I've found that -4 -4 or -3 -3 works just fine) up and to the left. Blur that (I usually do a Gaussian Blur at 4 or 5), contrast-auto-stretch it (it's a plug-in), and invert it.

(Figure 2: U2)
Add U1 and U2 together (channel ops --> add)

(Figure 3: U3)
We'll also need a shadow to float it over, so offset the original (U1) down and to the right (+3 +3 or +4 +4 works for me), Gaussian Blur it at 5. contrast-auto-stretch is not necessary here, although it may help if you are turning it transparent!
(Figure 4: U4)
This is going to be the shadow "under" the text.
Now, pick/create/whatever a texture (if creating from scratch, I
usually use the Plasma plug-in, convert to grayscale, and then
multiply it by some appropriate color, but this works with
textures as well). In this case, I'll use three textures:
![[BLUE]](plain-blue.gif) (a
plain blue),
(a
plain blue),
![[CLOUDY BLUE]](cloudy-blue.gif) (a cloudy blue created with Plasma), and
(a cloudy blue created with Plasma), and
![[ICY BLUE]](icy-blue.gif) (an icy blue texture I found somewhere on the net).
(an icy blue texture I found somewhere on the net).
Multiply U3 (the rounded one) and the chosen texture. Then do a Channel Ops --> Composite of the result onto U4 (the shadow), with the original text (U1) as the mask. Instant, floating text!

(Figure 5: Using the plain blue)

(Figure 6: Using the cloudy blue)

(Figure 7: Using the icy blue)
See? Simple!