
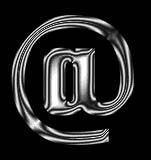
I recommend using big and wide characters for this effect (so it looks much better).
First start a new RGB image. Define new alpha channel in Channel Palette by clicking triangle and choosing New Channel... (If you dont have it, then Window>Palettes>Channels.
Make sure you have white foreground and black background. Type text using type tool.

Make a copy of that channel with your characters. (by draggin the channel over small "new..." icon in channel palette.
Rename it to #5 (by clicking on it twice and entering a new name.)
Filter>Blur>Gaussian Blur>3.0 (you might use bigger value if your character is VERY BIG).

Make a copy of channel #5 and rename a copy to #6.
Switch to channel #5 and Filter>Other>Offset, enter -1, -1. (Here you can also use bigger values depending on the size of the type)
Switch to channel #6 and use same filter but with settings 1, 1.
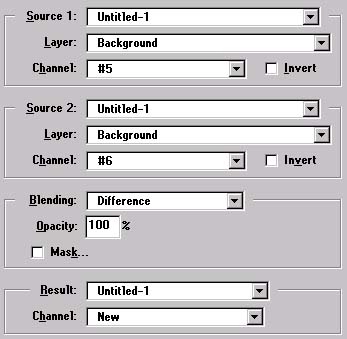
Now time for channel calculations. (Image/Calculations...)
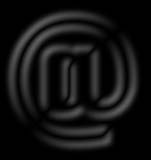
Now, Image>Map>Invert. Then Image>Adjust>Auto Levels.

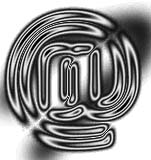
Fine, now goes artistic part of that effect (it's complex, yes). Choose airbrush tool in toolbox, set pressure (in Options Palette) to 6%, pick big brush (45 pixels wide or so) choose black as foreground color and make some sprays over your text. Notice that areas that you will leave unpainted will be more shiny. You gotta play with that to learn :-)
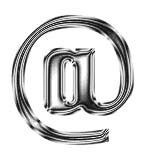
Actually, on the following image you almost dont see those black sprays (thery are more light gray than black). But the thing is that if you do lines darker everything will be messed after next step. So watch out.

Here, those dark lines are very hard to see but with the next step we will intensify it, so dont worry.
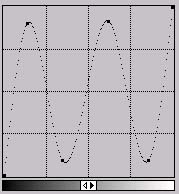
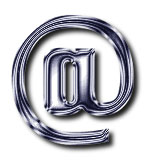
Then Image>Adjust>Curves and draw curve similar to one on the image shown (This adds reflections to the letters).
Now it's almost ready. Select>Load Selection>#4.
Select>Inverse. Fill it with black (Edit>Fill...).
Then load the selection again (Select>Load Selection>#4). Now Select>Modify>Contract>3 pixels. This option may also change.. This will be the bevel for our letters, so look out yourself.
Select>Inverse. Then Image>Map>Invert.
Ok, we have a letters ready.. Select>All, Copy to clipboard, switch to RGB channel and paste there.
Now we gotta colorize those and drop some nice shadow, but first load selection #4 again and copy it to clipboard.
You can switch to RGB Channel and fill it with some nice texture or whatever you want. I left it white in this example.
Paste the characters, Image>Adjust>Variations..., choose nice colour and then drop shadow using Alien Skin Drop Shadow (free on the net).
© 1996 Nick Ustinov.