Tip supplied by Eric Fettweis.
This tip is more complex than others and it requires you to have additional tools, such as Adobe Illustrator and some of KPT plugins. Anyhow, if you are smart enough you will do it w/o Illustrator etc.
The numerical values that I indicate here are valid in this particular example, but you'll probably have to adapt them, depending on the font you will use and the final resolution you want
1)
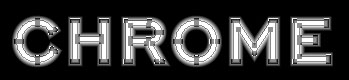
In Illustrator, choose a "regular" font (not too bold), type your word and turn it into a path. (Here, Engravers Gothic 72 pt)
In the "paint style" palette, select white fill and no stroke.
Then draw a rectangle without fill nor stroke around your word
Select the letters
2)
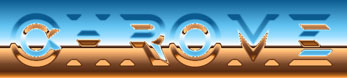
You have now to create a halo effect, from white to black, around your letters, by superposition of several paths with decreasing width. (Several methods will give the same result. Here, I used the KPT Shadowland plug-in).
Set the number of steps according to the final resolution you want, in order to get a smooth gradient, and set the scale so that the "holes" in the letters don't disapear. (Here, Halosity=5pt and Steps=20).
Click OK then select "Pointed" joins, Mitter limit = 1. You should obtain something like this.

3)
Select all, and copy it.
In Photoshop, create a new document in grayscale mode. It will have the same size as the rectangle you previously drawn in Illustrator. (Resolution choosed here : 150 ppp)
Fill background with black, paste, and shrink the selection of 1 pixel. Then save this selection into a new channel that you'll name "Mask".

4)
Go back to Illustrator, select the foreground letters of your word and the rectangle and copy them.
Paste them "as paths" in your photoshop document, delete the rectangle and save the path.
5)
Duplicate the black channel into a new document and apply the emboss filter (Angle=90°, height=1 pixel, Amount= 330%), then apply a 1-pixel gaussian blur.
Save this document, naming it "Reflections", and close it.

6)
Duplicate the "Mask" channel, select the path you had saved, fill it with black, and apply a 1-pixel gaussian blur.

7)
Apply the emboss filter (Angle=0°, height=1 pixel, Amount=130%) and then apply the Solarize filter.
Duplicate this channel into a new document and save it, naming it "Distortions", then close it.

8)
Create a new channel filled with black (name it "emboss"), choose the path you had saved and make selection with it.
Apply a 2 pixels centered white stroke.

9)
Apply the emboss filter (Angle=-45°, Height=1 pixel, Amount=80%)

10)
Duplicate the black channel and name the copy : "relief". Apply the emboss filter (Angle=-45°, height=1 pixel, amount=300%), then the Unsharp Mask Filter (Amount=100%, Radius=5 pixels, Threshold=0)

11)
Go back to the black channel, and change it into RGB Mode.
Make a horizon background. (This one is a modified preset of KPT Gradient Designer : "Blue sky Chrome reflection")

12)
Apply the Displace Filter (Horizontal scale=0 / Vertical scale=half of your image height (here : 78) / Stretch to Fit / Repeat Edge Pixels), and choose the previously-saved file called "Reflections"
13)
Apply the displace filter again, but this time with the following values : Horizontal Scale=0 / Vertical scale=-1/16 of your image height (here : -10) / Stretch to Fit / Repeat Edge Pixels, and choose the previously-saved file called "Distortions"
14)
Create a new layer in Hard Light mode. Apply the "Relief" channel to it.

15)
Create a new layer in Overlay mode. Apply the "Emboss" channel to it.

16)
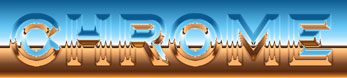
That's finished. You have just to flatten layers and load selection from the "mask" channel, to copy and paste your chrome type on the background you want.
You can also use the cross-shaped brush to add the final touch.