
Tip supplied by John Milleker Jr.
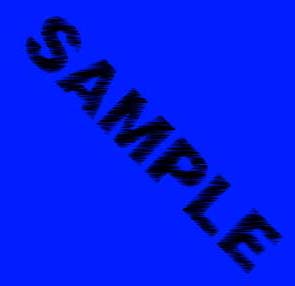
Before opening a "NEW" Window, select the Background and Foreground you
wish to use. In the sample, I used a Blue Background, and a Black
Foreground. For starters, use two colors that contrast good together.. Like
Blue and Black, or Red and Black.
Open a New window. Try 400x300 pixels, RGB color, and before you hit OK,
Go down to the bottom of that window and click "Backround Color."
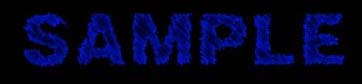
Now type your text, big, bold, and centered.

Go to Image, Rotate, Arbitrary. Enter a value of 45 Degrees and click on
Clockwise (CW). This will set up the image so we can apply "Wind"
diagonally to it.
Go to Filter, Stylize, Wind. Method is "Wind", Direction is "Left". Hit
Ok.
Now go back into the Wind filter and make the direction "Right."
To allow us to "Wind" the other diagonals of the image, go to Image,
Rotate, 90 Degrees CW.
8 Repeat steps 5 and 6.
Go back to Image, Rotate, Arbitrary. Enter a value of 135 and
CounterClockWise direction (CCW).

Your image will now look smaller. Use the CROP tool in the toolbar to
isolate the image better. This tool looks like an Origami bird or
something.

Now, select the "FILL" tool (Looks like a paintbucket) and fill around
the outside of the image. (This is assuming, that you have not changed your
colors in the process)

And don't forget the centers of letters like P's, A's. lowercase e's.
Etc..
13. Most importantly next, don't be afraid to try other filters, weird and
new color combinations, and ideas! Try the Diffuse filter for a
"Stencil/Paintbrush effect." After you get this far, try picking a totally
new foreground color after step 10 and continuing. Don't forget to play
with Image, Adjust, Hue/Saturation, and Click on "Colorize."
© 1996 Nick Ustinov.