
Ed's Frozen Text Tutorial
Hi, welcome to my easy 12-step program for giving your graphics
the deep freeze with the
GIMP. As you may have guessed, the
sparkle plug-in
is needed for this one. As with all tutorials, this document describes
detailed steps to just one particular effect. A lot of similar but different effects
are available by playing around and doing some steps differently. Use your
imagination! :)
Twelve steps to the big chill
U1.
Create a new Greyscale image, and put some text in it. This is
Untitled-1, or U1. Keep it around, it will be used several times during
this little operation.
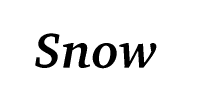 U1
U1
U2.
Duplicate U1, then run Gaussian blur 5.00.
Do the "contrast autostretch" on it, to bring it to full
brightness/darkness. Then, invert the image so it is white
on black. (Sometimes, I add it to itself at this point,
which makes even more sparkles later on. But I didn't do
that this time, and if I add it in now, all my "U" numbers
will get out of sync with the tutorial :)
 U2
U2
U3.
Create a new RGB color image. Use "fill" to color it all black, then
run "add noise" at its default setting of 20.
Run "contrast autostretch" on it to brighten it up.
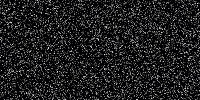 U3
U3
U4.
Multiply U2 and U3. Run the sparkle effect. (Typically I use
Threshold 0.6061, Flare Intensity 0.303, Spike length 30,
Spike Points 6, and Angle 15 degrees. But in this tiny image
I had to bump Threshold to 0.8 and Intensity to 0.4.
Your mileage may vary on this; my machine at home produces a weird
red aura with sparkle, but my machine at work does not. I don't know
what is different). Anyway!
Then run BCG (Brightness- Contrast- Gamma), and alter the red/green/blue gamma
values to your taste. The "snow" effect here is red 1.0, green 3.0, and
blue 4.0. Hang onto this image, it will be used again near the end.
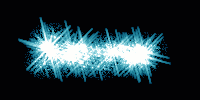 U4
U4
U5.
Invert U1, so it is white text on black background.
Then add U1 to U4. Don't worry if it comes out unreadable; in fact,
readability at this stage might mean you're not using enough sparkle.
 U5
U5
U6.
Convert U5 to Greyscale. Run Map/Threshold on it with value 0.
Then invert it. This should make a nice mask for the sparkle.
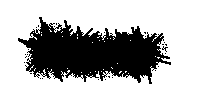 U6
U6
U7.
Run "Offset" a few pixels over and down, typically I use
X 7 and Y 4 as my offsets.
Then run Gaussian Blur 4.00. We're making a dropshadow here.
(In this tiny example, I used offset X5, Y2, with blur 3.0).
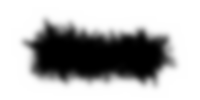 U7
U7
U8.
Multiply U7 by U6. Now we have the background with dropshadow.
If you like you can multiply this by a texture, for a textured
background, but for this tutorial the background is white.
 U8
U8
U9.
Offset U1 by the same values you used in U7 above (X7, Y4), then Gaussian Blur by the
same value you used un U7's blur (4.00). We're preparing to do
the punched-out
text trick here.
By the way, U1 (and thus U9) is still white on black, thanks to inverting
it in step U5.
 U9
U9
U10.
Multiply U9 by U1. We now have punched-out text. If you like you can
multiply this by a texture, to add texture to the inside of the letters.
(Of course, you don't have to use punched-out text at all. You can have
any sort of text you like, if it fits inside the sparkles nicely).
 U10
U10
U11.
Composite U4 with U10, using U1 as mask. (If you're wondering, U1
has a black background [since step 5] which will reproduce the sparkles
in Composite's "First Image" U4. U1 also has white text, which will
reproduce the punched-out text in Composite's "Second Image" U10).
Thus you should get punched-out text with sparkles around it.
 U11
U11
U12.
Finally, add U11 to U8.
 U12
U12
Check it out. Awesome.
Last modified 6/20/96 by Ed Mackey. You can send me
email or go back to
my GIMP page.


 U1
U1 U2
U2 U3
U3 U4
U4 U5
U5 U6
U6 U7
U7 U8
U8 U9
U9 U10
U10 U11
U11 U12
U12