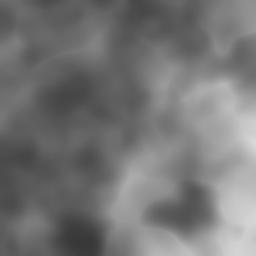
 Figure 1: Untitled-1.0 with Plasma
One of the nice things about graphics programs like Adobe Photoshop and The GIMP, is that you can do many cool things with image, text, and textures. If you don't already have the added plug-ins that have been contributed to the GIMP, you should get them. They are available (in some cases, precompiled) at The GIMP Plug-In List.
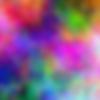
This is an tutorial for a smoke texture. I'm sure the method is well known to many people. But this may be helpful for those of you just starting out with the GIMP. First, make two File->New (Ctrl+N) images of the same size. They will be Untitled-1.0 and Untitled-2.0. Now run the plasma plug-in on each one, selecting a turbulence of 2.0 or greater. Next Filter->Blur->Gaussian Blur (Shift+Alt+B) each at around level 10.
Figure 1: Untitled-1.0 with Plasma
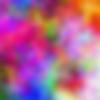 Figure 2: Untitled-2.0 with Plasma
Now take the Difference (Shift+Alt+D) of the two plasma images.
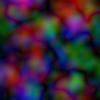 Figure 3: Difference of Figure 1 and Figure 2 (plasma images)
Next we Invert (Alt+I) this composite image to get Figure 3.1. Now this is a neat image you can do lots of things with. What we are going to do is Multiply (Alt+M) it back into one of the first plasma images (Figure 1 or Figure 2). This should give us a very wispy mix of colors.
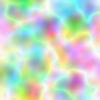 Figure 3.1: Figure 3 after inversion.
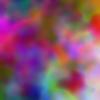 Figure 4: Figure-3.1 multiplied into either of the first plasma images.
Now Greyscale (Shift+Alt+G) this new image to get the smoky texture. You may have to play with the lighting to get it just right (I use the Brightness Contrast Gamma, or BCG, filter for this).